Configuration
- Add new AS Numbers
- Search for existing AS Numbers
- Modify existing AS Numbers
- View information about AS Numbers in use
- Generate traffic analysis reports for specific AS Numbers
- Expand the Configuration menu.
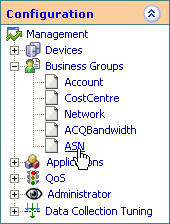
- Select Configuration > Business Groups > AS. The
AS Configuration Screen appears in the display section.
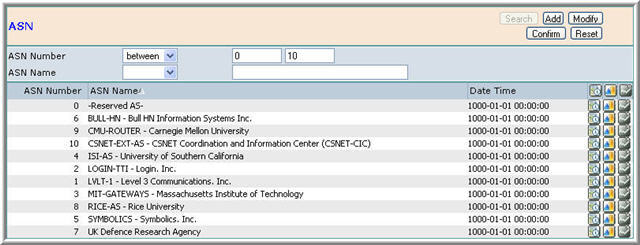
The AS Table

The AS Table displays the following for each AS Number:
- AS ID
- AS Number
- AS Name
- Date Time
- Report Production Buttons
- After entering AS Configuration, click the Add button.

- Enter an AS Number. The AS ID is automatically entered.
- Enter the AS Name.
- Click Confirm. The new AS Number is added to the table.
- From the AS table, select an existing AS by highlighting the appropriate row in the table.
- Click Modify. The AS Numbers details will appear in the edit boxes.

- Edit any of the properties as you see fit. You cannot edit the AS ID, as it might be associated with other properties in the database.
- Click Confirm. The AS Number details are updated in the table.
- Above the AS table, click Search. The following is displayed:

- Specify one or more search parameters. Do not forget to assign each search parameter with a logical operator.
- Click Confirm. The table is populated with all the AS Numbers which match the query parameters.
 produce a Week Day Traffic baseline report for this AS.
 produce a Bar graphic report displaying Destination IP Range by
Source AS.
 produce a Timeline graphic report displaying Source AS by Server
Port.
 - Add new Device Groups
- Search for existing Device Groups
- Modify existing Device Groups
- Delete existing Device Groups
- View information about Device Groups in use
- Generate traffic analysis reports for specific Device Groups.
- Expand the Configuration menu.
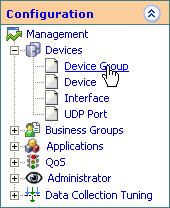
- Select Configuration > Devices > Device Group. The
Device Group Configuration Screen appears in the display section.

The Device Group Table

The Device Group Table includes the following elements:
- Device Group ID
- Device Group Name
- Report Production Buttons
- After entering Device Group Configuration, click the Add button.

- Enter a Device Group Name. The Device Group ID is automatically generated by Netflow Auditor.
- Click Confirm. The new Device Group is added to the table.
- From the Device Group Table, select an existing Device Group by highlighting the appropriate row in the table.
- Click Modify. The Device Group's details will appear in the edit boxes.

- Edit the Device Group Name. You cannot edit the Device Group ID, as it might be associated with other properties in the database.
- Click Confirm. The Device Group's details are updated in the table.
- From the Device Group Table, select an existing Device Group by highlighting the appropriate row in the table.
- Click Delete. The Device Group's details will appear in the edit boxes.

- Make certain that you wish to delete this Device Group.
- Click Confirm. The Device Group is deleted from the table.
- Above the Device Group Table table, click Search. The following is
displayed:

- Specify one or more search parameters. Do not forget to assign each search parameter with a logical operator.
- Click Confirm. The table is populated with all the Device Groups which match the query parameters.
 produce a Week Day Traffic baseline report for this Device Group.
 produce a Bar graphic report displaying Destination IP's by Source
Device Group.
 produce a Timeline graphic report displaying Source Device Group by
Server Port.
 produce a Bar graphic report displaying Destination Device Group by
Source Device Group for Flows.
 produce a Timeline graphic report displaying Source Device Group by
Server Port for Flows.
 - Add new devices
- Search for existing devices
- Modify existing devices
- View information about devices in use
- Generate traffic analysis reports for specific devices.
- Expand the Configuration menu.
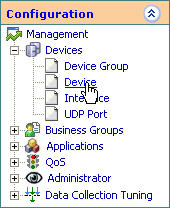
- Select Configuration > Devices > Device. The Device
Configuration Screen appears in the display section.
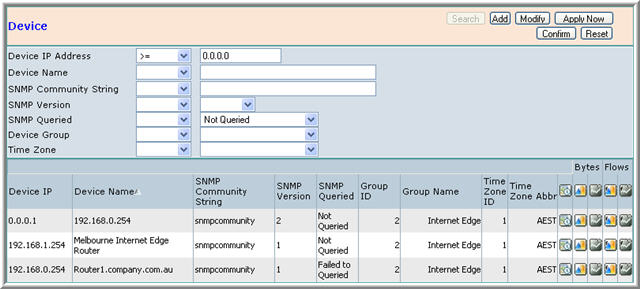
The Device Table

The Device Table displays the following for each device:
- Device IP
- Device Name
- SNMP Community String
- SNMP Version
- Group ID
- Group Edge
- Time Zone ID
- Time Zone Abbreviation
- Report Production Buttons
- After entering Device Configuration, click the Add button.

- Enter the Device IP Address.
- Enter a Device Name. Later, the name will appear identify this device in traffic analysis reports.
- Enter an SNMP Community String. The SNMP Community String is used by Netflow Auditor for monitoring network-attached devices for conditions that warrant administrative attention.
- Select an SNMP Version.
- Select a Device Group.
- Select a Time Zone.
- Click Confirm. The new device is added to the table.
Modifying a Device
You may modify an existing Device.
To modify a device:
- From the Devices table, select an existing device by highlighting the appropriate row in the table.
- Click Modify. The Device's details will appear in the edit boxes.

- Edit any of the properties as you see fit.
- Click Confirm. The device's details are updated in the table.
Search for Existing Devices
You may want the Devices Table to display only a specified group of devices according to selected characteristics.
To search for existing devices:
- Above the Devices table, click Search. The following is displayed:

- Specify one or more search parameters. Do not forget to assign each search parameter with a logical operator.
- Click Confirm. The table is populated with all the devices which match the
query parameters.
Producing Reports for a Specific Device
You may want to produce a traffic analysis report for a specific device, or a baseline report for all devices. To produce a report for a specific device, click one of the Report Production buttons on the right-most column of that device's row in the table.
Choose one of the following:
 produce a Week Day Traffic baseline report for this Device.
 produce a Bar graphic report displaying Destination IP's by Source
Device.
 produce a Timeline graphic report displaying Source Device by Server
Port.
 produce a Bar graphic report displaying Destination IP's by Source
Device for Flows.
 produce a Timeline graphic report displaying Source Device by Server
Port for Flows.
See: Device Reports
Interfaces
^Top An Interface is a means by which to define several different entities within the same Device. For example, on the same machine, you may have several web servers running, each using a different protocol. You will want to monitor each of these separately.
When defining an Interface, it is also associated with a Device. Therefore, before starting to define Interfaces, you will already have defined Devices.
See: Devices
Configuring Interfaces
To configure interfaces, you must enter the Interface Configuration Screen.
In this screen you can:
- Add new interfaces
- Search for existing interfaces
- Modify existing interfaces
- View information about interfaces in use
- Generate traffic analysis reports for specific interfaces.
To enter the Interfaces Configuration Screen:
- Expand the Configuration menu.
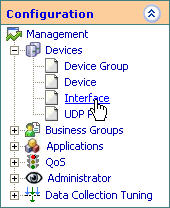
- Select Configuration > Devices > Interfaces. The
Interface Configuration Screen appears in the display section.
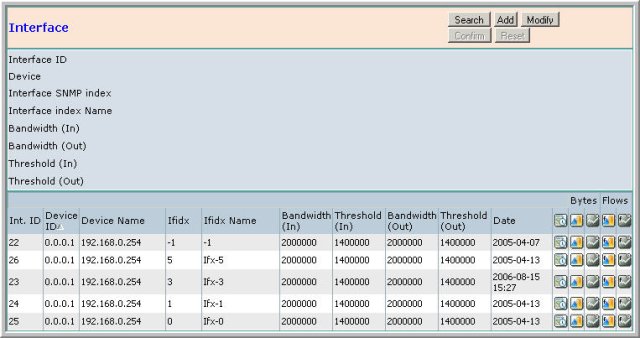
The Interface Table

The Interface Table displays the following for each interface:
- Interface ID
- Device ID
- Device Name
- Interface SNMP Index
- Interface Index Name
- Bandwidth (In)
- Threshold (In)
- Bandwidth (Out)
- Threshold (Out)
- Date
- Report Production Buttons
Adding a Interface
To add a new interface:
- After entering Interface Configuration, click the Add button.

- Select a Device with which to associate the Interface. The Interface ID is automatically generated by Netflow Auditor.
- Enter an Interface SNMP Index.
- Enter an Interface Index Name.
- Enter, in Bytes, the bandwidth allocated to this interface's In/Out traffic.
- Enter, in Bytes, the threshold for this interface's In/Out traffic. This threshold will be used to generate alerts.
- Click Confirm. The new interface is added to the table.
Modifying a Interface
You may modify an existing Interface.
To modify a interface:
- From the Interfaces table, select an existing interface by highlighting the appropriate row in the table.
- Click Modify. The Interface's details will appear in the edit boxes.

- Edit any of the properties as you see fit.
- Click Confirm. The interface's details are updated in the table.
Search for Existing Interfaces
You may want the Interfaces Table to display only a specified group of interfaces according to selected characteristics.
To search for existing interfaces:
- Above the Interfaces table, click Search. The following is displayed:

- Specify one or more search parameters. Do not forget to assign each search parameter with a logical operator.
- Click Confirm. The table is populated with all the interfaces which match
the query parameters.
Producing Reports for a Specific Interface
You may want to produce a traffic analysis report for a specific interface, or a baseline report for all interfaces. To produce a report for a specific interface, click one of the Report Production buttons on the right-most column of that interface's row in the table.
Choose one of the following:
 produce a Week Day Traffic baseline report for this Interface.
 produce a Bar graphic report displaying Destination IP's by Source
Interface.
 produce a Timeline graphic report displaying Source Interface by
Server Port.
 produce a Bar graphic report displaying Destination IP's by Source
Interface for Flows.
 produce a Timeline graphic report displaying Source Interface by
Server Port for Flows.
See: Interface Reports
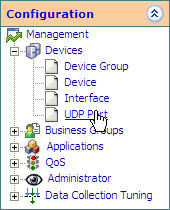


Protocols
^Top A Protocol is a set of rules governing communication between devices.
It can be a powerful tool for Network Administrators to monitor traffic for each Internet Protocol. Many protocols are already configured by default in Netflow Auditor.
Configuring Protocols
To configure protocols, you must enter the Protocol Configuration Screen.
In this screen you can:
- Add new protocols
- Search for existing protocols
- Modify existing protocols
- View information about protocols in use
- Generate traffic analysis reports for specific protocols.
To enter the Protocols Configuration Screen:
- Expand the Configuration menu.
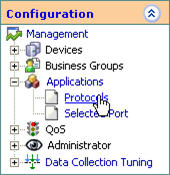
- Select Configuration > Applications > Protocols.
The Protocol Configuration Screen appears in the display section.
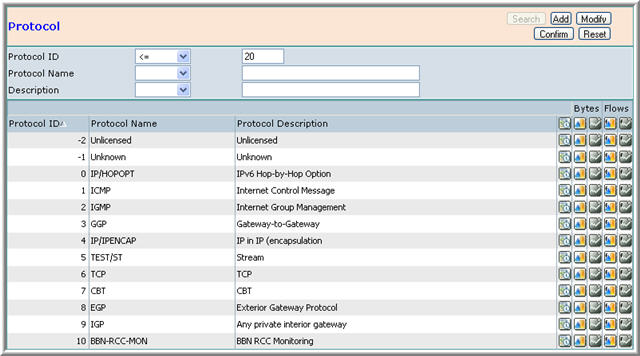
The Protocol Table
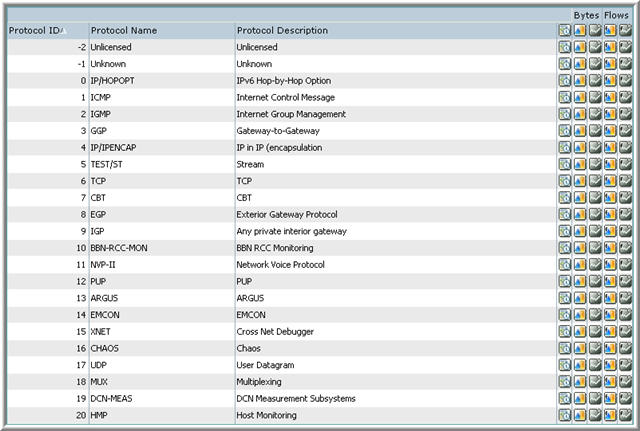
The Protocol Table displays the following for each protocol:
- Protocol ID
- Protocol Name
- Protocol Description
- Report Production Buttons
Adding a Protocol
Although, Netflow Auditor supplies you with a ready made list of Protocols, you may choose to add new ones.
To add a new protocol:
- After entering Protocol Configuration, click the Add button.

- Enter an Protocol ID. You cannot enter an ID that is already being used.
- Enter an Protocol Name.
- Enter a Protocol Description. This may be a brief sentence describing the Protocol.
- Click Confirm. The new protocol is added to the table.
Modifying a Protocol
You may modify an existing Protocol.
To modify a protocol:
- From the Protocols table, select an existing protocol by highlighting the appropriate row in the table.
- Click Modify. The Protocol's details will appear in the edit boxes.

- Edit any of the properties as you see fit.
- Click Confirm. The protocol's details are updated in the table.
Search for Existing Protocols
You may want the Protocols Table to display only a specified group of protocols according to selected characteristics.
To search for existing protocols:
- Above the Protocols table, click Search. The following is displayed:

- Specify one or more search parameters. Do not forget to assign each search parameter with a logical operator.
- Click Confirm. The table is populated with all the protocols which match the
query parameters.
Producing Reports for a Specific Protocol
You may want to produce a traffic analysis report for a specific protocol, or a baseline report for all protocols. To produce a report for a specific protocol, click one of the Report Production buttons on the right-most column of that protocol's row in the table.
Choose one of the following:
 produce a Week Day Traffic baseline report for this Protocol.
 produce a Bar graphic report displaying Destination IP's by Source
Protocol.
 produce a Timeline graphic report displaying Source Protocol by
Server Port.
 produce a Bar graphic report displaying Destination IP's by Source
Protocol for Flows.
 produce a Timeline graphic report displaying Source Protocol by
Server Port for Flows.
See: Protocol Reports
Ports
^Top A port is a virtual data connection that can be used by Devices to exchange data directly.
Many Ports are already configured by default in Netflow Auditor.
Configuring Ports
To configure ports, you must enter the Port Configuration Screen.
In this screen you can:
- Add new ports
- Search for existing ports
- Modify existing ports
- Delete existing ports
- View information about ports in use
- Generate traffic analysis reports for specific ports.
To enter the Ports Configuration Screen:
- Expand the Configuration menu.
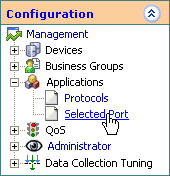
- Select Configuration > Applications > Selected
Port. The Port Configuration Screen appears in the display section.
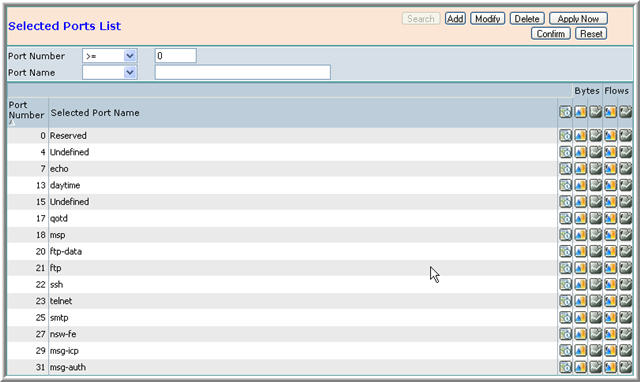
The Port Table
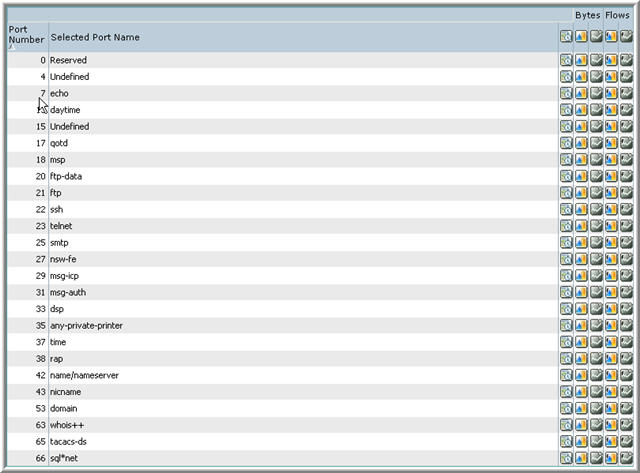
The Port Table displays the following for each port:
- Port Number
- Selected Port Name
- Report Production Buttons
Adding a Port
Although, Netflow Auditor supplies you with a ready made list of Ports, you may choose to add new ones.
To add a new port:
- After entering Port Configuration, click the Add button.

- Enter a Port Number. You cannot enter a number that is already being used.
- Enter an Port Name.
- Click Confirm. The new port is added to the table.
Modifying a Port
You may modify an existing Port.
To modify a port:
- From the Ports table, select an existing port by highlighting the appropriate row in the table.
- Click Modify. The Port's details will appear in the edit boxes.

- Edit any of the properties as you see fit.
- Click Confirm. The port's details are updated in the table.
Deleting a Port
You may delete an existing Port.
To delete a port:
- From the Ports table, select an existing port by highlighting the appropriate row in the table.
- Click Delete. The Port's details will appear in the edit boxes.

- Make certain that you wish to delete this Port.
- Click Confirm. The Port is deleted from the table.
Search for Existing Ports
You may want the Ports Table to display only a specified group of ports according to selected characteristics.
To search for existing ports:
- Above the Ports table, click Search. The following is displayed:

- Specify one or more search parameters. Do not forget to assign each search parameter with a logical operator.
- Click Confirm. The table is populated with all the ports which match the
query parameters.
Producing Reports for a Specific Port
You may want to produce a traffic analysis report for a specific port, or a baseline report for all ports. To produce a report for a specific port, click one of the Report Production buttons on the right-most column of that port's row in the table.
Choose one of the following:
 produce a Week Day Traffic baseline report for this Port.
 produce a Bar graphic report displaying Destination IP's by Source
Port.
 produce a Timeline graphic report displaying Source Port by Server
Port.
 produce a Bar graphic report displaying Destination IP's by Source
Port for Flows.
 produce a Timeline graphic report displaying Source Port by Server
Port for Flows.
See: Port Reports
QoS
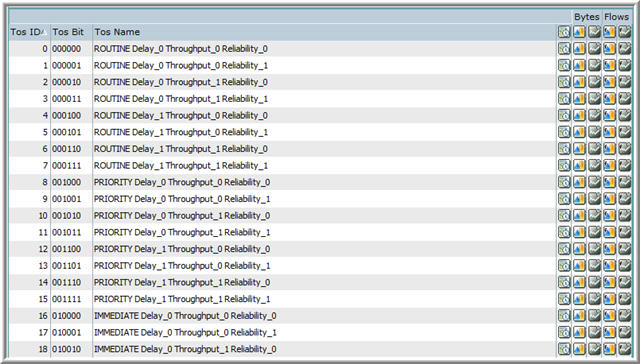
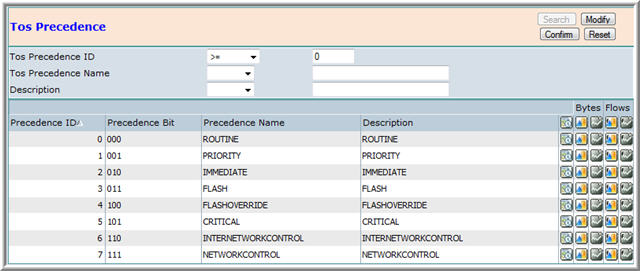
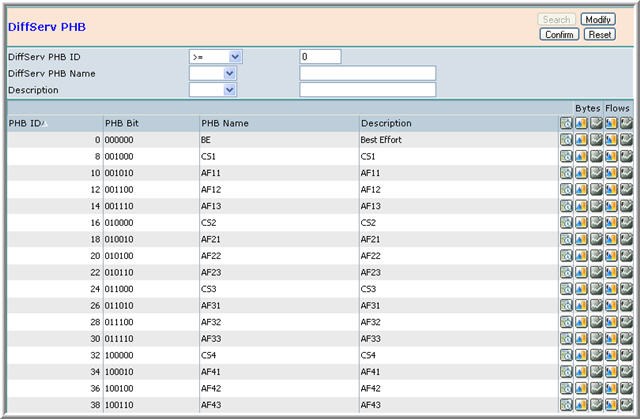
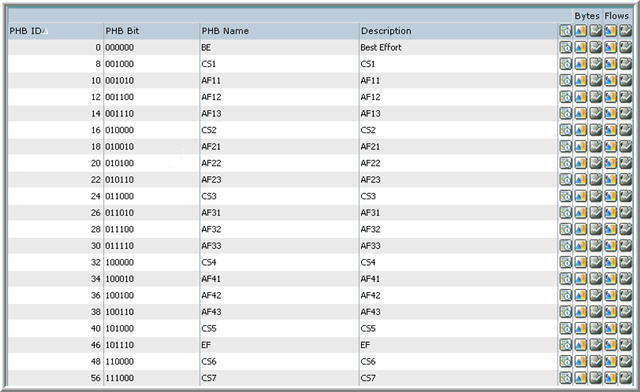
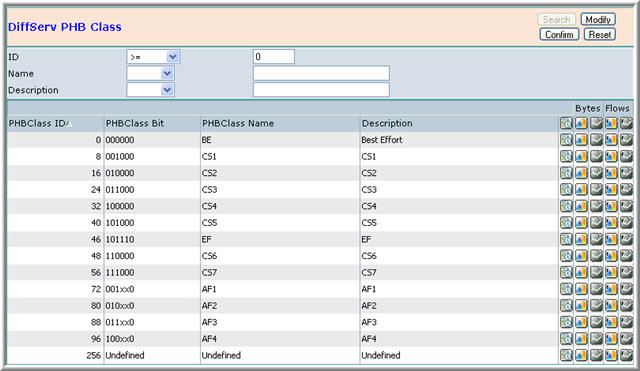
^Top Quality of Service (QoS) refers to the probability of a packet succeeding in passing between two points in the network within its desired latency period. This creates a standard, by which the highest level of QoS is defined as "Best Effort" and this is succeeded by lower levels, in which each packet has to wait longer for the router to attend to it. Netflow Auditor enables you to analyze network traffic in relation to different QoS Levels. By default, many levels of QoS are already defined: Tos; Tos Precedence; DiffServ (PHB) and PHB Class
Configuring QoS
To configure QoS, you must enter the QoS Configuration Screen.
In this screen you can:
- Add new QoS
- Search for existing QoS
- Modify existing QoS
- Delete existing QoS
- View information about QoS in use
- Generate traffic analysis report for specific QoS.
To enter the QoS Configuration Screen:
- Expand the QoS Configuration menu.
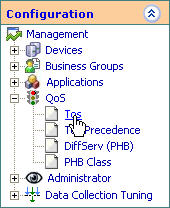
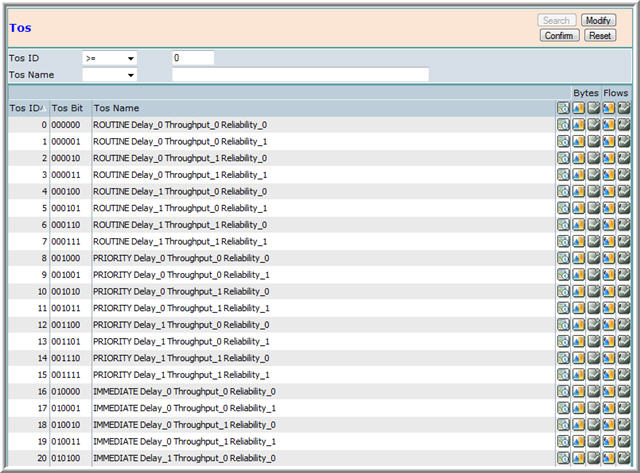
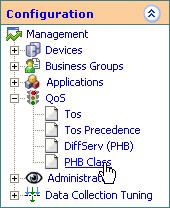
- Select Configuration > QoS. The QoS Configuration Screen appears in the display section.
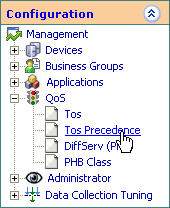
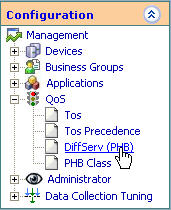
- Select Configuration > QoS > ToS/Tos Precedence/DiffServ (PHB)/PHB Class.
Modifying a QoS Value
You may modify an existing QoS value.
To modify a QoS value:
- From the QoS table, select an existing QoS value by highlighting the appropriate row in the table.
- Click Modify. The QoS value's details will appear in the edit boxes.

Search for Existing QoS Values
You may want the QoS Table to display only a specified group of QoS values according to selected characteristics.
To search for existing QoS values:
- Above the QoS table, click Search. The following is displayed:
- Specify one or more search parameters. Do not forget to assign each search parameter with a logical operator.
- Click Confirm. The table is populated with all the QoS values which match
the query parameters.





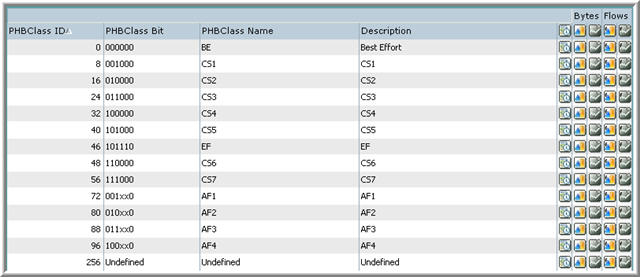


- Edit any of the properties as you see fit.
- Click Confirm. The QoS value's details are updated in the table.
Location Tagging Configuration
^Top Location Tasks
^Top When starting to use Netflow Auditor, you would have to do the following:
- Create Accounts. See Accounts
- Create Cost centres. See Cost Centres
- Define Network IP Ranges. See Network IP Ranges
Accounts
^Top Accounts are units which are used in defining segments of your network. An account will mark different segments of your network that are used for the same purpose, or in the same context. An Account, therefore, may be associated with more than one Network segment.
See: Network IP Ranges
Configuring Accounts
To configure Accounts, you must enter the Accounts Configuration Screen.
In this screen you can:
- Add new accounts
- Search for existing accounts
- Modify existing accounts
- View information about accounts in use
- Generate traffic analysis reports for specific accounts.
To enter the Accounts Configuration Screen:
- Expand the Configuration menu.
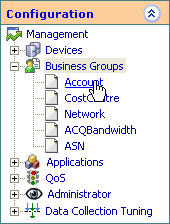
- Select Configuration > Business Groups > Accounts.
The Account Configuration Screen appears in the display section.
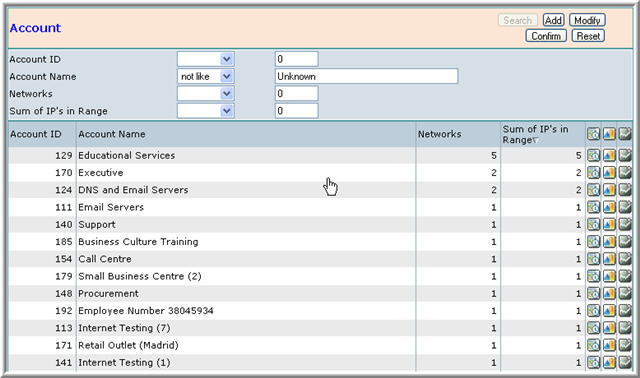
The Account Table
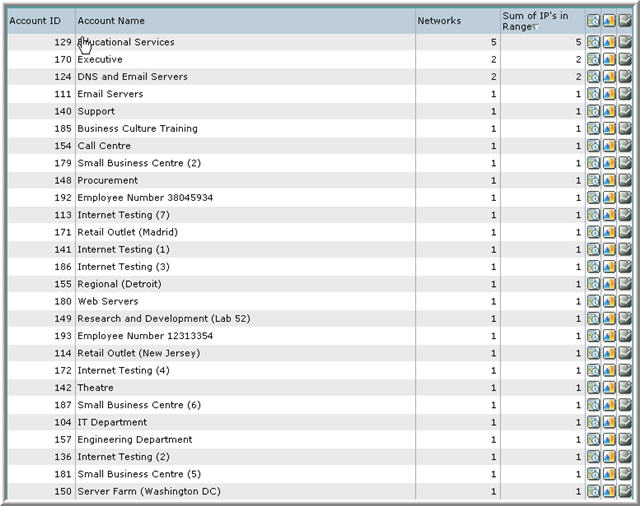
The Account Table displays the following for each account:
- Account ID
- Account Name
- Networks - the number of Network IP Ranges associated with this account.
- Sum of IP's in Range - the number of possible IP's in these ranges.
- Report Production Buttons
Adding an Account
You may add as many accounts as you need to properly segment your network. However, once an account is added, it cannot be removed.
To add a new account:
- After entering Account Configuration, click the Add button.

- Enter an Account Name. The Account ID is automatically entered.
- Click Confirm. The new account is added to the table.
Modifying an Account
You may change an account's name but not its ID. This is because the ID, at this stage, might be associated in the database with Network segments.
To modify an account:
- From the Accounts table, select an existing account by highlighting the appropriate row in the table.
- Click Modify. The Account's details will appear in the edit boxes.

- Modify the Account Name.
- Click Confirm. The account's details are updated in the table.
Search for Existing Accounts
You may want the Accounts Table to display only a specified group of accounts according to selected characteristics.
To search for existing accounts:
- Above the Accounts table, click Search. The following is displayed:

- Specify one or more search parameters. Do not forget to assign each search parameter with a logical operator.
- Click Confirm. The table is populated with all the accounts which match the query parameters.
Producing Reports for a Specific Account
You may want to produce a traffic analysis report for a specific account, or a baseline report for all accounts. To produce a report for a specific account, click one of the Report Production buttons on the right-most column of that account's row in the table.
Choose one of the following:
 produce a Week Day Traffic baseline report for this account.
 produce a Bar graphic report displaying Destination IP Range by
Source Account.
 produce a Timeline graphic report displaying Source Account by
Server Port.
See: Account Reports
Cost Centres
^Top Cost centres, just like accounts are units which are used in defining segments of your network. A cost centre will tie together different segments of your network to which the same rules apply.
A cost centre is defined by two properties:
- Cost Centre ID
- Cost Centre Name
See: Network IP Ranges
Configuring Cost Centres
To configure cost centres, you must enter the Cost Centre Configuration Screen.
In this screen you can:
- Add new cost centres
- Search for existing cost centres
- Modify existing cost centres
- View information about cost centres in use
- Generate traffic analysis reports for specific cost centres.
To enter the Cost Centres Configuration Screen:
- Expand the Configuration menu.
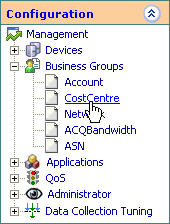
- Select Configuration > Business Groups > Cost
Centres. The Cost Centre Configuration Screen appears in the display
section.
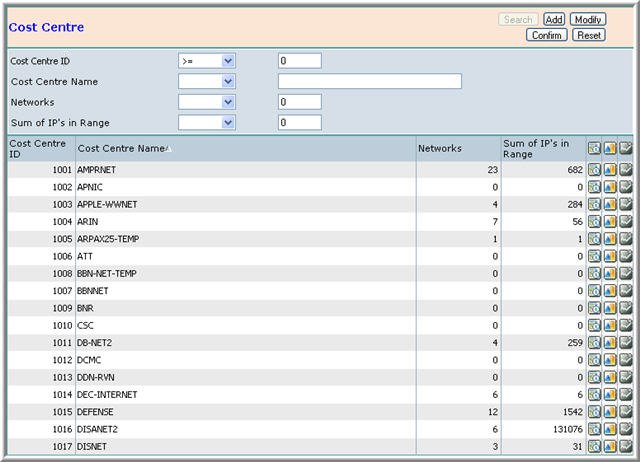
The Cost Centre Table
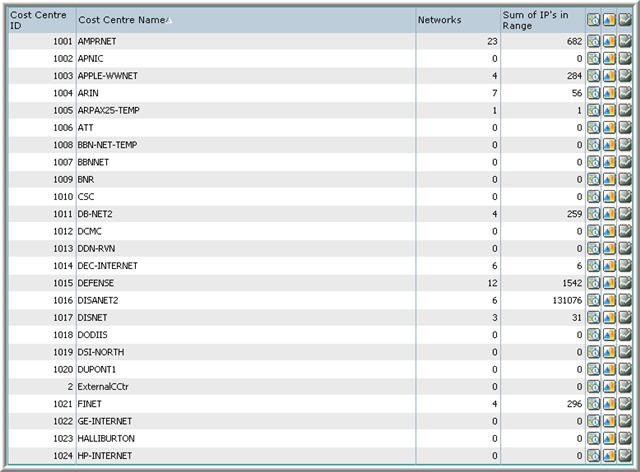
The Cost Centre Table displays the following for each cost centre:
- Cost Centre ID.
- Cost Centre Name.
- Networks - the number of Network IP Ranges associated with this cost centre.
- Sum of IP's in Range - the number of possible IP's in these ranges.
- Report Production Buttons
Adding a Cost Centre
You may add as many cost centres as you need to properly segment your network. However, once a cost centre is added, it cannot be removed.
To add a new cost centre:
- After entering Cost Centre Configuration, click the Add button.

- Enter a Cost Centre Name. The Cost Centre ID is automatically entered.
- Click Confirm. The new cost centre is added to the table.
Modifying a Cost Centre
You may change a cost centre's name but not its ID. This is because the ID, at this stage, might be associated in the database with Network segments.
To modify a cost centre:
- From the Cost Centres table, select an existing cost centre by highlighting the appropriate row in the table.
- Click Modify. The Cost Centre's details will appear in the edit boxes.

- Modify the Cost Centre Name.
- Click Confirm. The cost centre's details are updated in the table.
Search for Existing Cost Centres
You may want the Cost Centres Table to display only a specified group of cost centres according to selected characteristics.
To search for existing cost centres:
- Above the Cost Centres table, click Search. The following is displayed:

- Specify one or more search parameters. Do not forget to assign each search parameter with a logical operator.
- Click Confirm. The table is populated with all the cost centres which match the query parameters.
Producing Reports for a Specific Cost Centre
You may want to produce a traffic analysis report for a specific cost centre, or a baseline report for all cost centres. To produce a report for a specific cost centre, click one of the Report Production buttons on the right-most column of that cost centre's row in the table.
Choose one of the following:
 produce a Week Day Traffic baseline report for this cost centre.
 produce a Bar graphic report displaying Destination IP Range by
Source Cost Centre.
 produce a Timeline graphic report displaying Source Cost Centre by
Server Port.
See: Cost Centre Reports
Network IP Range
^Top Network IP Ranges are used for segmenting your network. Each of these segments may have different meaning, different purpose and different rules associated with it.
How It Works The entire Network is segmented into ranges according to two parameters:
- Accounts
- Cost Centres
This enables you to segment your network according to more than one aspect. For example, you can segment your entire Network into ranges representing Public domains and Private domains, but at the same time divide your IP ranges according to a grading system.
Initial Network Settings
Initially, you will have the following pre-defined Network IP Ranges:
Start IP End IP Account Cost Centre 0.0.0.0 9.255.255.255 Public Public 10.0.0.0 10.255.255.255 Private Private 11.0.0.0 171.255.255.255 Public Public 172.0.0.0 172.255.255.255 Private Private 173.0.0.0 191.255.255.255 Public Public 192.0.0.0 192.255.255.255 Private Private 193.0.0.0 255.255.255.255 Public Public These settings segment your entire network into Public and Private domains. Three ranges are classified as Private, while the rest of the Network is Public. You may choose, however, to change these settings as you please.
Before You Begin Defining Network IP Ranges
When defining a Network IP Range, it is not enough to supply the beginning and end of the range. At this stage, you must have already defined Accounts and Cost Centres with which to associate each range. These require strategic planning, and much thought as to the different means by which you will segment your Network.
For example, you can define a list of Accounts, which segment your Network into different user groups, and define a list of Cost Centres, which segment your network into Public and Private domains.
See: Accounts & Cost Centres
Configuring Network IP Ranges
To configure Network IP ranges, you must enter the Network Configuration Screen.
In this screen you can:
- Add new Network IP Ranges
- Search for existing Network IP Ranges
- Modify existing Network IP Ranges
- Delete existing Network IP Ranges
- View information about Network IP Ranges in use
- Generate traffic analysis reports for specific Network IP Ranges.
To enter the Network Configuration screen:
- Expand the Configuration menu.
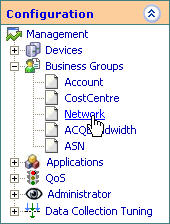
- Select Configuration > Business Groups > Network.
The Network Configuration Screen appears in the display section.
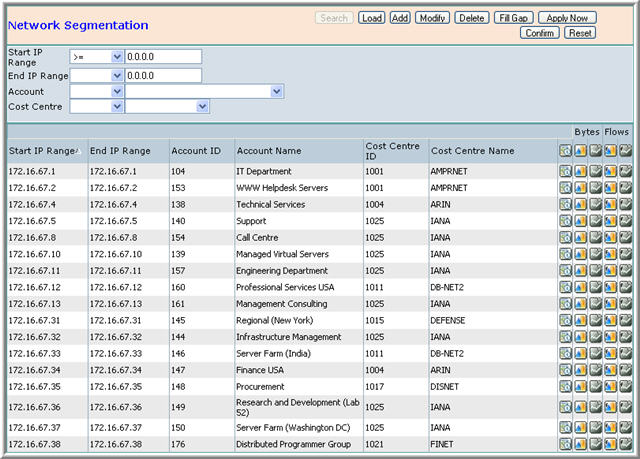
The Network Table
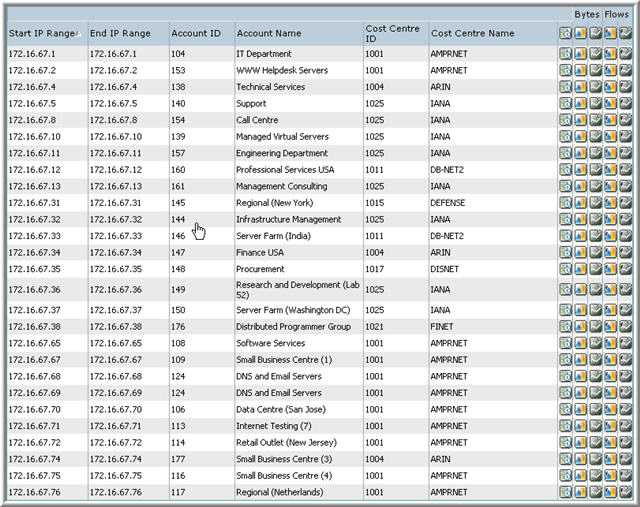
The Network Table includes the following elements:
- Start IP Range - the Start IP of the Network IP range.
- End IP Range - the End IP of the Network IP range.
- Account ID - the ID of the account associated with this Network IP range.
- Account Name - the name of the account associated with this Network IP range.
- Cost Centre ID - the ID of the cost centre associated with this Network IP range.
- Cost Centre Name - the name of the cost centre associated with this Network IP range.
- Report Production Buttons
Adding Network IP Ranges
To add a new Network IP Range:
Using Form
^Top - After entering Network Configuration, click the Add button.

- Enter a Start IP Range (an IP address marking the beginning of the range).
- Enter an End IP Range (an IP address marking the end of the range).
- Select an Account from the list. This list is populated by all the defined accounts.
- Select a Cost Centre from the list. This list is populated by all the defined cost centres.
- Click Confirm. The new Network IP Range is added to the table.
Using Upload Procedure
^Top The Upload process is deisigned to read all IP range configuration from a .CSV file and automatically upload these configurations into the Account, CostCentre and Network tables.
The Netflow Auditor IP range upload feature reads configuration files from a choice of selected csv templates, catering for a variety of standard network output formats. This feature is used for initial uploads and busy enterprise environments.
Warning!: this feature will eliminate all previous configurations.
- After entering Network Configuration, click the Upload button.

- Select CSV template format for information from the format menu.

- Browse to the location of the CSV file.
- Click Confirm. The new Network IP Range is added to the table.
Note: In extremely busy environments upload may take as long as 10 minutes to complete due to data processing during the subsequent restart of the Netflow Auditor process. This process is fully automated and should not result in any data loss. However it is recommended that this procedure be carried out outside of normal business hours.
Modifying a Network IP Range
You may modify an existing Network IP Range.
To modify a Network IP Range:
- From the Network Table, select an existing Network IP Range by highlighting the appropriate row in the table.
- Click Modify. The Network IP Range's details will appear in the edit
boxes.

- Edit any of the properties as you see fit.
- Click Confirm. The Network IP Range's details are updated in the table.
Deleting a Network IP Range
You may delete an existing Network IP Range.
To delete a Network IP Range:
- From the Network Table, select an existing Network IP Range by highlighting the appropriate row in the table.
- Click Delete. The Network IP Range's details will appear in the edit
boxes.

- Make certain that you wish to delete this Network IP Range.
- Click Confirm. The Network IP Range is deleted from the table.
Search for Existing Network IP Range
You may want the Network Table to display only a specified group of Network IP Ranges according to selected characteristics.
To search for existing Network IP Ranges:
- Above the Network Table table, click Search. The following is displayed:

- Specify one or more search parameters. Do not forget to assign each search parameter with a logical operator.
- Click Confirm. The table is populated with all the Network IP Ranges which match the query parameters.
Producing Reports for a Specific Network IP Range
You may want to produce a traffic analysis report for a specific Network IP Range, or a baseline report for all Network IP Ranges.
To produce a report for a specific Network IP Range, click one of the Report Production buttons on the right-most column of that Network IP Range's row in the table.
Choose one of the following:
 produce a Week Day Traffic baseline report for this IP Range.
 produce a Bar graphic report displaying Destination IP Range by
Source IP Range.
 produce a Timeline graphic report displaying Source IP Range by
Server Port.
 produce a Bar graphic report displaying Destination IP Range by
Source IP Range for Flows.
 produce a Timeline graphic report displaying Source IP Range by
Server Port for Flows.


Users
^Top You can define the users which may log into Netflow Auditor. By Default, a single "Administrator" user is defined, but you can add as many users as you please, each with their own Username and Password.
Configuring Users
To configure users, you must enter the User Configuration Screen.
In this screen you can:
- Add new users
- Search for existing users
- Modify existing users
- Delete existing users
- View information about users in use
To enter the Users Configuration Screen:
- Expand the Configuration menu.
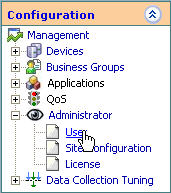
- Select Configuration > Administrator > Users. The
User Configuration Screen appears in the display section.

The User Table

The User Table displays the following for each user:
- User Name
- Password
- Group Name
Adding a User
Once an Administrator is logged in, they may add new users who may subsequently enter the Netflow Auditor Web Front End.
To add a new user:
- After entering User Configuration, click the Add button.

- Enter an User Name. You cannot enter a name that is already being used.
- Enter and re-enter a password.
- Select a Group Name
- Click Confirm. The User's details are added into the table and this user may
now log into Netflow Auditor.
Modifying a User
You may modify the details of an existing User.
To modify a user:
- From the Users table, select an existing user by highlighting the appropriate row in the table.
- Click Modify. The User's details will appear in the edit boxes.

- Edit any of the properties as you see fit.
- Click Confirm. The user's details are updated in the table.
Deleting a User
You may delete an existing User, so they may no longer be able to log into Netflow Auditor.
To delete a user:
- From the User table, select an existing user by highlighting the appropriate row in the table.
- Click Delete. The User's details will appear in the edit boxes.

- Make certain that you wish to delete this User.
- Click Confirm. The User is deleted from the table.
Search for Existing Users
You may want the Users Table to display only a specified group of users according to selected characteristics.
To search for existing users:
- Above the Users table, click Search. The following is displayed:

- Specify one or more search parameters. Do not forget to assign each search parameter with a logical operator.
- Click Confirm. The table is populated with all the users which match the
query parameters.











NetFlow Auditor Manual
Configuration |
^Top |
AS Numbers |
^Top |
An AS is a unique identifier for a collection of IP networks and routers under the control of one entity.
Configuring AS Numbers
To configure AS Numbers, you must enter the AS Configuration Screen.
In this screen you can:
To enter the AS Configuration Screen:
Adding an AS
You may add as many AS Numbers as you need to properly segment your network. However, once an AS Number is added, it cannot be removed.
To add a new AS:
Modifying an AS
You may change an AS Number but not its ID. This is because the ID, at this stage, might be associated in the database with Network segments.
To modify an AS:
Search for Existing AS Numbers
You may want the AS Table to display only a specified group of AS Numbers according to selected characteristics.
To search for existing AS Numbers:
Producing Reports for a Specific AS
You may want to produce a traffic analysis report for a specific AS Number, or a baseline report for all AS Numbers. To produce a report for a specific AS Number, click one of the Report Production buttons on the right-most column of that AS Number's row in the table.
Choose one of the following:
See: AS Reports
Device Groups |
^Top |
A Device Group is a means by which to group devices together, so that a report may be produced displaying the summing up of several devices. When defining a Device it is associated with a Device Group.
See: Devices
Configuring Device Groups
To configure Device Groups, you must enter the Device Group Configuration Screen.
In this screen you can:
To enter the Network Configuration screen:
Adding a Device Group
To add a new Device Group:
Modifying a Device Group
To modify a Device Group :
Deleting a Device Group
You may delete an existing Device Group.
To delete a Device Group:
Search for Existing Device Group
You may want the Device Group Table to display only a specified group of Device Groups according to selected characteristics.
To search for existing Device Groups:
Producing Reports for a Specific Device Group
You may want to produce a traffic analysis report for a specific Device Group, or a baseline report for all Device Groups.
To produce a report for a specific Device Group, click one of the Report Production buttons on the right-most column of that Device Group's row in the table.
Choose one of the following:
See: Device Group Reports
Devices |
^Top |
A Device relates to a specific IP address, usually but not necessarily, to one specific machine. In this way, a report may be produced for a specific user on the Network.
When defining a Device, it is also associated with a Device Group, allowing you to produce a report for the summing up of many devices. Therefore, before starting to define Devices, you will already have defined Device Groups.
See: Device Groups
Configuring Devices
To configure devices, you must enter the Device Configuration Screen.
In this screen you can:
To enter the Devices Configuration Screen:
Adding a Device
To add a new device:
